
Loyalty roles and permissions
Updated Last verified against the product
In short
Velarya roles decide which staff can view or change your loyalty program, in Organization settings > Roles & Permissions. Admins hold every permission, Location Managers adjust points, run challenges and create discount codes, and Front Desk checks patients in and sees their balances. To change a system role, duplicate it and edit the copy.
- Who can do this
- Admins and roles with Roles & permission builder set to manage
- Applies to
- Your whole practice, every location
- Plans
- Basic, Scale, Branded and Connected
- Time
- 10 minutes
Which permissions control your loyalty program?
Ten Velarya permissions control your loyalty program, from Rewards & loyalty program for the program’s settings to Wallet, points & credits for each patient’s balances. Each permission has a ladder of levels in the permission grid of Roles & Permissions, and every level includes the ones below it, so a role at edit can also view.
| Permission | Level | What the level unlocks | Applies to |
|---|---|---|---|
| Rewards & loyalty program | view | Rewards Program in Organization settings, read only: the Earning Rule, Sign-Up Bonus, Birthday Gift and Point Ledger | Whole practice |
| edit | Changing and saving everything on Rewards Program | ||
| Challenges (check-in/referral) | view | Rewards > Check-Ins and Referrals in the sidebar, and Challenges in Organization settings, read only | Whole practice |
| edit | Changing the check-in and referral challenges | ||
| moderate | Everything at edit, plus Approve and Reject on referrals in Rewards > Referrals | ||
| Discounts, offers & vouchers | view | Discounts & Offers in Organization settings, to see every code and its uses, and its Deleted list | Whole practice |
| edit | Creating, editing, turning off and deleting discount codes, and restoring deleted ones | ||
| Membership plan definitions | view | Memberships in Organization settings, read only | Whole practice |
| edit | Add plan, and editing or deleting a plan | ||
| Overview & analytics | view | The Overview page and its daily counts | Whole practice |
| Wallet, points & credits | view | The Wallet and Rewards balances on a patient’s profile | Each location |
| adjust | Adjust next to both balances, to add or take away points and wallet credit | ||
| Check-in & scanning | On | The Scan QR code button (the QR icon) on Front Desk, to check a patient in with the code in their app | Each location |
| Member lifecycle (pause/resume/cancel/change-tier) | view | The Club Membership card on a patient’s Memberships & Wallet tab | Each location |
| manage | Assigning a plan, Modify plan, Cancel membership and Undo cancellation | ||
| Discounts at checkout | apply | Adding a discount code or a Custom Discount ($) to a sale, in its billing, the checkout panel or a New Transaction | Each location |
| override | Everything at apply, plus changing a visit’s Pricing row at checkout | ||
| Client personal info | view | Patient profiles in Clients, including the birthday on the Contact card; see How patient profiles work | Each location |
| edit | Editing the Contact card, including Date of Birth, which the birthday gift uses |
Some permissions need another one first, and the editor turns the prerequisite on for you. Wallet, points & credits and Member lifecycle (pause/resume/cancel/change-tier) need Client personal info at view, Check-in & scanning needs Calendar & appointments at view, and Discounts at checkout needs Transactions / orders at edit. Turning a prerequisite off turns off the permissions that depend on it.
The Point Ledger shows the location you are working in, or the one you pick in its own location menu, plus practice-wide awards: the sign-up bonus, birthday gifts, referral rewards and points patients redeem in the app. The Check-Ins log shows the location you are working in. Admins with more than one location can choose All locations in both. The Referrals log lists every referral in the practice. All three show patient names as your role’s Client name visibility allows, such as a first name and the initial of the surname.
For the settings each loyalty permission protects, see Set up points earning, Set up a birthday gift, Create a membership plan and Create a discount code.
For the permissions that protect contact details, comments, files and clinical records, see How patient privacy works.
What does each role get by default?
Velarya’s four system roles come with locked loyalty permissions, the same in every practice. Admins hold every permission. Location Managers adjust points and run challenges, discount codes and patients’ memberships. Front Desk checks patients in and applies discount codes and custom discounts. Service Providers view patient profiles.
| Permission | Admin | Location Manager | Front Desk | Service Provider |
|---|---|---|---|---|
| Rewards & loyalty program | edit | view | None | None |
| Challenges (check-in/referral) | moderate | edit | None | None |
| Discounts, offers & vouchers | edit | edit | None | None |
| Membership plan definitions | edit | view | None | None |
| Overview & analytics | view | view | None | None |
| Wallet, points & credits | adjust | adjust | view | None |
| Check-in & scanning | On | On | On | Off |
| Member lifecycle | manage | manage | view | None |
| Discounts at checkout | override | override | apply | None |
| Client personal info | edit | edit | edit | view |
| Staff directory | manage | manage | view | view |
| Roles & permission builder | manage | view | None | None |
Approving and rejecting referrals takes Challenges (check-in/referral) at moderate, which Admins hold by default. To check a role’s permissions yourself, open Roles & Permissions, select ⋯ at the end of the role’s row and choose View permissions.

Change what a role can do
You change what a Velarya role can do in Roles & Permissions, on a custom role or on a copy of a system role, because system roles are locked.
- Open the menu at the bottom of the left sidebar and select Organization settings.
- Select Roles & Permissions under Staff. A lock next to a role’s name marks a system role.
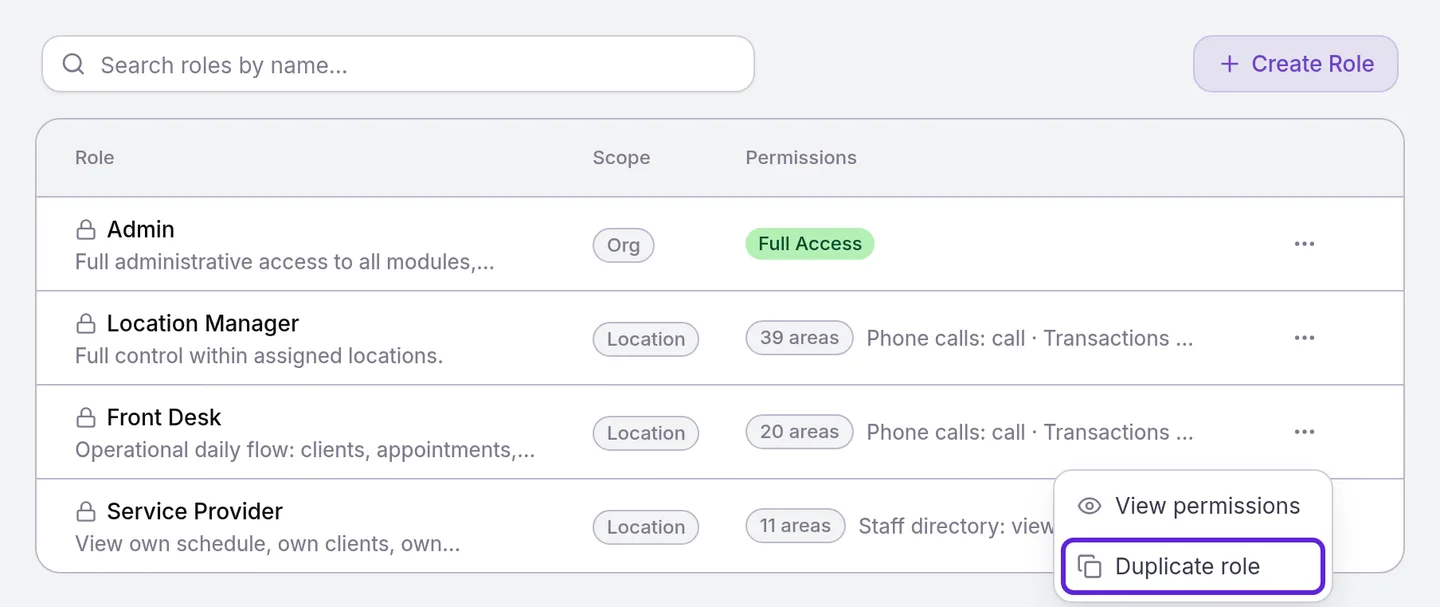
- Select ⋯ at the end of the closest role’s row, then Duplicate role. A copy with “(Copy)” after its name, such as Front Desk (Copy), appears at the bottom of the list.
- Select ⋯ on the copy, then Edit role.
- Rename the role in Role Name, for example “Front Desk with points”.
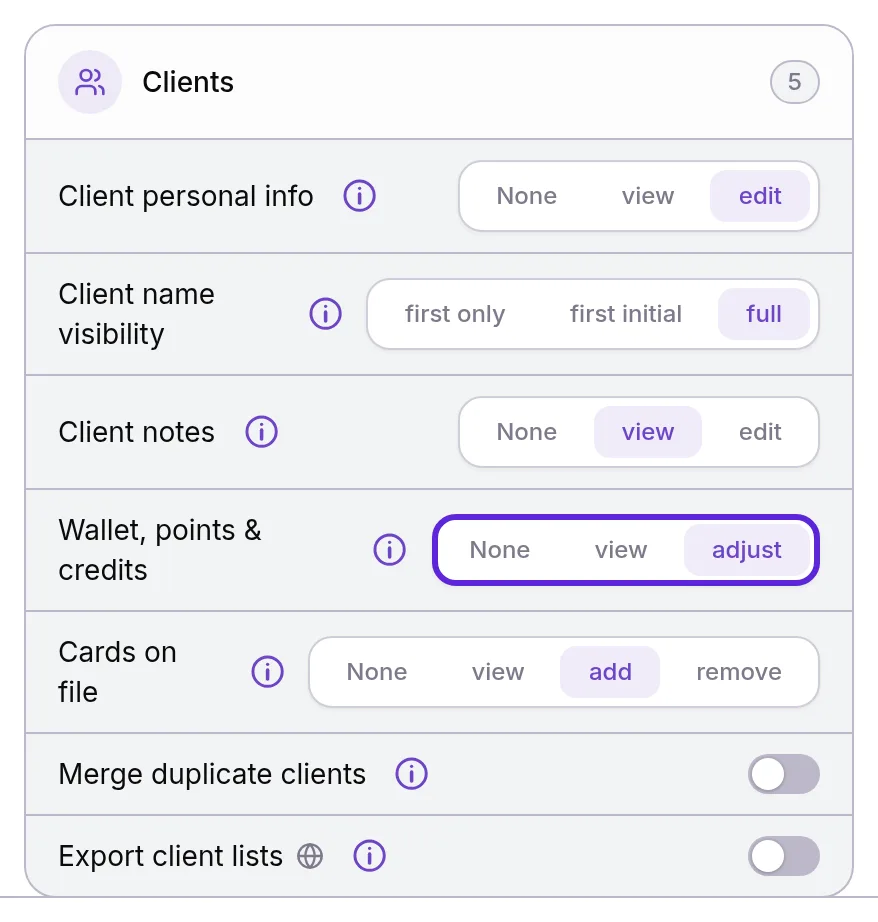
- Choose a level for each loyalty permission under Manage Permissions, such as adjust for Wallet, points & credits. Velarya turns on any permission it depends on, such as Client personal info at view.
- Select Save Changes. The dialog closes, the Permissions column shows the role’s new permissions, and every staff member who holds the role gets them within 30 seconds.
Hierarchy level sets who can give the role: lower is more senior (Admin 0, Location Manager 10, Front Desk 20, Service Provider 30). Staff other than Admins can give, edit or delete only roles with a higher number than their own. A new role starts at 50 and a copy keeps the original’s level, so give a senior role 10 or lower and Location Managers cannot hand it out. Default scope set to Location lets the role be chosen in Role at a location.
To build a role from an empty grid instead, select Create Role. A new role needs a Role Name of at least 2 characters and at least one permission.
Give a staff member the role
A staff member’s Role on their Overview tab sets their Velarya permissions across your practice. Role at a location, in the next section, adds a second role at that location.
- Select Staff Directory under Staff in Organization settings.
- Select the staff member. Their profile opens on Overview.
- Choose the new role in Role.
- Select Save. Profile saved appears.

Changing someone’s role needs Staff directory at manage, which Admins and Location Managers hold.
For the steps staff then take, see Adjust a patient’s points or wallet credit and Check in a patient with a QR code.
Are loyalty permissions set per location?
Five Velarya loyalty permissions apply per location: Wallet, points & credits, Check-in & scanning, Member lifecycle (pause/resume/cancel/change-tier), Discounts at checkout and Client personal info. Each applies at the location a staff member is working in, which they choose in the menu at the bottom of the left sidebar. The other five apply to your whole practice and come from the Role on the staff member’s Overview tab.
A staff member can hold a second role at one of their locations, for example Location Manager at the location they run. At that location, each permission takes the higher level of their Role and their Role at that location. To set it:
- Open the staff member in Staff Directory.
- Select the Schedule tab.
- Choose the location in Location, when they work at more than one.
- Choose the role in Role at followed by the location’s name, or Organization role to leave them with their Role alone there.

- Select Save. Role updated for this location appears.
Admins keep every permission at every location. Other staff work only with records at the locations they are assigned to: Velarya refuses to open, charge or refund another location’s visit or sale, print its receipt, check a patient in there by QR code or sell a membership there.
What does a staff member see without a permission?
Velarya shows staff only what their role’s permissions allow: pages and buttons they cannot use are hidden or grayed out.
| Where | Without the permission |
|---|---|
| Organization settings menu | The page is left out of the menu. A saved link to it opens the first settings page they can use |
| Organization settings, with no settings permission at all | “You don’t have any permission to view organization settings. Please contact your administrator if you need access.” |
| Any other page opened from a link | Access Denied: “You don’t have the necessary permissions to view this content. If you believe this is a mistake, contact your administrator.” with Go Back |
| A loyalty page in Organization settings, with its permission at view | The page, read only, with no Save and no create, edit or delete actions |
| Rewards in the sidebar | Hidden without Challenges (check-in/referral) |
| Rewards > Referrals | No Approve or Reject below moderate on Challenges (check-in/referral) |
| A patient’s profile | No Wallet or Rewards balance without Wallet, points & credits; no Adjust below adjust |
| A patient’s Memberships & Wallet tab | No Club Membership card without Member lifecycle (pause/resume/cancel/change-tier); no Modify plan or Cancel membership below manage |
| A sale | No Discount code or Custom Discount ($) field without Discounts at checkout |
| Front Desk | The Scan QR code button is grayed out without Check-in & scanning |
If something goes wrong
A level in the permission grid is grayed out, and hovering over it shows “You can’t grant more than you have”. You can grant only up to the level you hold yourself. Ask an Admin to set that level.
The Role field says “Changing someone’s role needs the Manage tier on Staff directory.” Your role holds Staff directory below manage. Ask an Admin to change the staff member’s role.
Saving a role change shows “Cannot assign a role with equal or higher authority than your own”. You can give only roles with a higher Hierarchy level number than your own. A Location Manager can give Front Desk or Service Provider; an Admin can give any role.
Saving a role shows “Cannot modify a role with equal or higher authority than your own”. The role’s Hierarchy level is the same as or lower than yours. Ask an Admin to edit it.
Changing your own Role shows “Cannot modify your own role. Ask another admin to do this.” Only Admins change their own role. Ask an Admin to make the change.
Saving a new role shows “Minimum 2 characters” under Role Name. Give the role a name of 2 to 80 characters.
Frequently asked questions
Was this guide helpful?
Last verified
What changed
- : Challenges (check-in/referral) at moderate now approves and rejects referrals in Rewards > Referrals, with a new FAQ. Discounts, offers & vouchers covers the Deleted list and restoring codes. A Role at a location now reads as a second role that adds to the staff member's Role, with the higher level of each permission applying there, and levels are written lowercase as the grid shows them.
- : Discounts at checkout: Apply covers discount codes and the Custom Discount ($) in billing, the checkout panel and New Transaction, and Override adds the Pricing row.
- : The Point Ledger's own location menu and practice-wide awards, name visibility in the loyalty logs, and location checks on visits, sales, receipts, refunds, QR check-ins and membership sales are described.