
Connect your payment account
Updated Last verified against the product
In short
To connect a payment account in Velarya, an Admin opens Organization settings > Payments, selects Connect account, and verifies the business and bank account on Stripe's setup pages, usually in 5 minutes. Card payments, deposits and saved cards start once the account shows Enabled or Complete, and a second account can serve locations that bank separately.
- Who can do this
- Admins, or custom roles with Payment accounts & fees at Manage
- Applies to
- Your whole practice, every location
- Plans
- Basic, Scale, Branded and Connected
- Time
- 10 minutes
Before you begin
- You are an Admin, or your role holds Payment accounts & fees at Manage.
- Your business details and the bank account your payouts should go to are at hand, for the payment provider's checks.
- Your locations are set up in Organization settings > Locations, so Velarya can link each one to the account.
Connect your payment account
A Velarya payment account is your practice’s own account with Velarya’s payment provider, where patients’ card payments settle before they are paid out to your bank. You connect it once for the whole practice; How payments work in Velarya explains how money moves through it.
- Open the menu at the bottom of the left sidebar and select Organization settings, then Payments under Payments.
- In the Payment accounts card, select Connect account. Velarya takes you to the setup pages of Stripe, its payment provider.
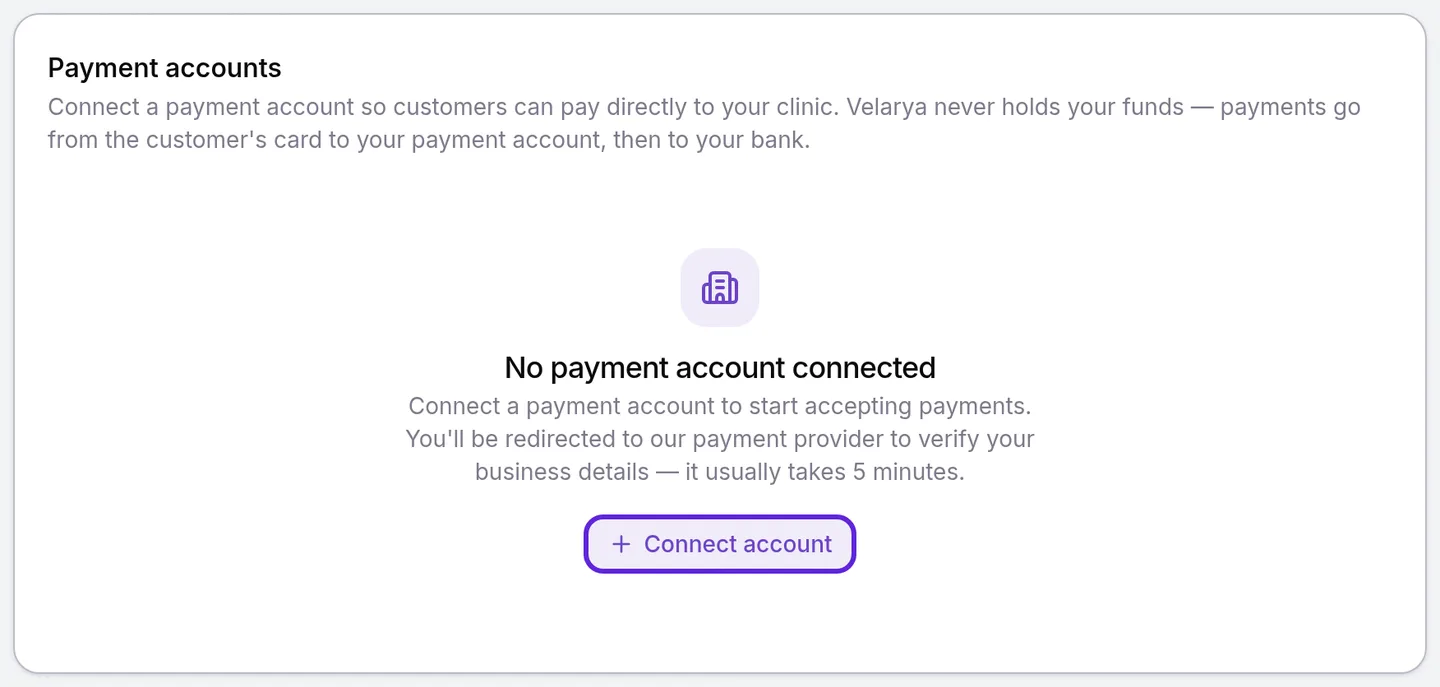
- Follow Stripe’s pages to verify your business and add the bank account your payouts go to. The Payments page says this usually takes 5 minutes.
- Finish the last page. Stripe returns you to Payments, where the account is listed as Main Account, with the Default badge and a status.
- Check the status. At Enabled or Complete, the row reads “Charges: enabled · Payouts: enabled”, Open payout dashboard appears, and your practice takes card payments.
Connecting your first account links every location you already have to it, and a notification tells you how many locations were linked. From Enabled or Complete, patients pay deposits and payments in full by card as they book, and your team charges cards at checkout. The Connect payments step of the setup guide is marked done. To choose what patients pay when they book, see Set up deposits and cancellation fees.
What do the account statuses mean?
Each Velarya payment account shows a status badge next to its name, and Velarya refreshes it each time you open the Payments page. Card payments go through on an account at Enabled or Complete.
| Status | What it means | What to do |
|---|---|---|
| Setup unfinished | Setup on Stripe’s pages was left before the end | Select Continue setup to pick up where you left off |
| Onboarding | You sent your details, and the payment provider is still checking them | Nothing yet: open the Payments page later to see the new status |
| Restricted | The payment provider needs more information: “More information is needed. Open the payout dashboard to resolve.” | Select Open payout dashboard and give what it asks for |
| Enabled | The account takes card payments and pays out, and the payment provider has details still due | Select Open payout dashboard and give the details it asks for before their due date, so the account stays Enabled |
| Complete | The account takes card payments and pays out, and the payment provider needs nothing more | Nothing |
| Disconnected | New payments to the account have stopped, and its record stays for past transactions | Connect a new one with Add another payment account if you need it |
Use a separate payment account for some locations
Most practices take every location’s payments into one Velarya payment account. Add a second one when a location is owned by a different legal entity or needs its own bank deposits.
Select Add another payment account, under your accounts. The Adding a second payment account? dialog lists what changes:
- Cards on file are saved per account, so patients add their card again the first time they visit a location on the other account.
- A membership is billed by the account of the location that sold it.
- Payout dashboards and bank deposits are separate for each account, and reporting stays in one place in Velarya.
Select Continue and connect another account. In Name this account, type a label such as the location’s name, then select Continue and set the account up on Stripe’s pages, as for your first one.
A new account starts with no locations. Once it shows Enabled or Complete, open Location assignment on the same page and choose it in the location’s list. “Location reassigned. Historical transactions are unchanged.” confirms the change. It applies to payments from then on, and past transactions stay on the old account.
Choose who pays the service fee
When your plan includes a Velarya service fee, the Payments page shows a Fees card with a Service fee row. Choose Absorb, the starting choice, to have the fee taken from your payout so patients never see it. Choose Pass to client to add it as its own Service fees line on the bill at checkout in your dashboard, which the patient pays. A practice that issues Saudi e-invoices always absorbs the fee, so its Fees card keeps Absorb selected, with a note saying why. Select Save changes to keep the choice, or Discard to go back. The choice applies to sales from then on.
The payment provider’s own card processing cost comes out of each card payment before it is paid out, separately from the service fee.
What do patients see?
Patients pay by card online once your Velarya payment account shows Enabled or Complete: deposits and payments in full as they book. Patients who get email notifications receive an email receipt from your practice for each card payment in the app, on your web booking page or through a payment link.
Until then, a patient who books a visit that needs payment online sees “This clinic can’t take online payments yet” on your web booking page and in the app. The message asks them to contact your practice. The web booking page also shows your Call us and WhatsApp buttons when you offer them. Bookings that are paid at your practice go through as usual.
If something goes wrong
“Couldn’t start onboarding” appears after you select Connect account. The request to create the account failed. Reload the Payments page. If the account is listed as Setup unfinished, select Continue setup; otherwise select Connect account again. If the message says Velarya’s payment provider connection is rejecting requests, contact Velarya support instead of retrying.
You left Stripe’s pages before the end. The account shows Setup unfinished. Select Continue setup to pick up where you left off.
“Couldn’t refresh onboarding link” appears after Continue setup. Select Continue setup again. If the message says to disconnect the account and connect a new one, select Disconnect, then connect a new account.
Stripe sends you back to Payments in the middle of setup. A setup link expires after a few minutes, so Velarya opens a fresh one and takes you back to Stripe. If “Couldn’t reopen onboarding” appears instead, select Continue setup.
The status stays on Onboarding. The payment provider is still checking your details. Open the Payments page again later: Velarya refreshes the status each time. If it turns Restricted, select Open payout dashboard and give what the dashboard asks for.
“You don’t have permission to connect a payment account. Ask an admin to finish this step.” Your role can view the Payments page and not manage it. An Admin connects the account, or gives your role Payment accounts & fees at manage.
A location takes no card payments, or pays into an account you didn’t mean it to. After you add a location, check its row in Location assignment, and choose the account if the list is blank or shows a different one than you want.
“Cannot disconnect: locations are still assigned to this account. Reassign them first.” Velarya disconnects an account once no location uses it. In Location assignment, choose another account for each location on it, then select Disconnect again. To replace your only account, connect the new one with Add another payment account first.
A banner says your practice “can’t take client payments yet. Still missing: connected payments.” No account is ready for card payments yet. Select Continue setup in the banner, which opens the Payments page, and finish connecting.
Frequently asked questions
Was this guide helpful?
Last verified
What changed
- : The Fees card explains that a practice issuing Saudi e-invoices always absorbs the service fee.